Professional Headshot for Resume: How to Get It Right
Should your resume carry a photo of your face? Ask three career advisers and you'll get three confident answers, which is usually the sign that the question is being asked the wrong way. A professional headshot for resume use isn't a single yes-or-no you settle once and reuse everywhere. It's a decision that follows the market you're applying in, the employer's instructions, and the role itself.
That framing matters because the same image can help you on one platform and hurt you on another. A polished portrait is close to mandatory on LinkedIn and often wrong on a United States resume. Decide the resume version first, then build the profile version around it.
Decide Whether Your Resume Needs a Photo
Generic advice treats the photo as either a universal advantage or a universal mistake. Market practice is far more divided than that. UseResume's breakdown of photo norms by country identifies Germany, Austria, Switzerland and Japan, along with several Asian, Latin American and European markets, as places where application photos remain common, while the United States, Canada, the United Kingdom, Australia, New Zealand and Ireland treat them as unusual and, in some settings, a discrimination risk.
Here's the split in one view.
When a resume photo fits, by market
| Market | Photo usually expected? | Typical norm | What to do |
|---|---|---|---|
| Germany, Austria, Switzerland | Often yes | Application photo is common | Include a neutral, current portrait unless the posting says no |
| Japan and several Asian, Latin American and European markets | Often yes | Photo is common on applications | Check the posting and follow the local format |
| United States, Canada, UK, Australia, New Zealand, Ireland | Generally no | Photos are unusual and can raise discrimination concerns | Leave the photo off the resume and use it on LinkedIn instead |
| Other markets | Check before applying | Practice follows the industry and the employer | Ask a recruiter or a local contact in that market |
The four checks that settle it
- Local convention in the target market. Where you're applying, not where you were born, sets the default. A candidate raised in Ohio applying to Munich follows Munich.
- The employer's instructions. A job posting that asks for a photo overrides any convention. So does one that explicitly asks you to omit it. Read the posting twice before you open your photo folder.
- Whether the role is regulated or customer-facing. Banks, law firms, healthcare employers and client-facing sales teams read presentation as part of the job. A back-office engineering role rarely does.
- Whether an applicant tracking system will parse the file. A photo adds nothing to keyword matching, and a badly embedded image can break the layout of an otherwise clean document.
The version that catches people out: a headshot can be right on LinkedIn or in a portfolio and wrong on the resume in the same week. International applicants, remote workers and anyone applying across borders should keep two files rather than converting one on the fly.
Then there's the evidence on appearance. In a randomized résumé experiment in Argentina, identical applications with attractive photos received callbacks at 10.3%, compared with 7.6% for applications featuring unattractive photos, a gap of 2.7 percentage points, as reported by MIT's Abdul Latif Jameel Poverty Action Lab evaluation. That measures differential treatment by appearance. It doesn't promise that any particular photo helps you.
The action is small and concrete. Pull up three live postings in your target market. If none of them mentions a photo and local practice is to leave it off, leave it off and spend the effort on your summary instead.
How to Set Up a Resume Headshot Shoot
A portrait that has to survive being displayed an inch wide on a resume is a lighting problem before it's a grooming problem. Small displays lose detail fast, so shadows, clutter and softness that look fine on your phone screen turn into noise at document size. The fix is a controlled setup rather than a lucky snapshot.
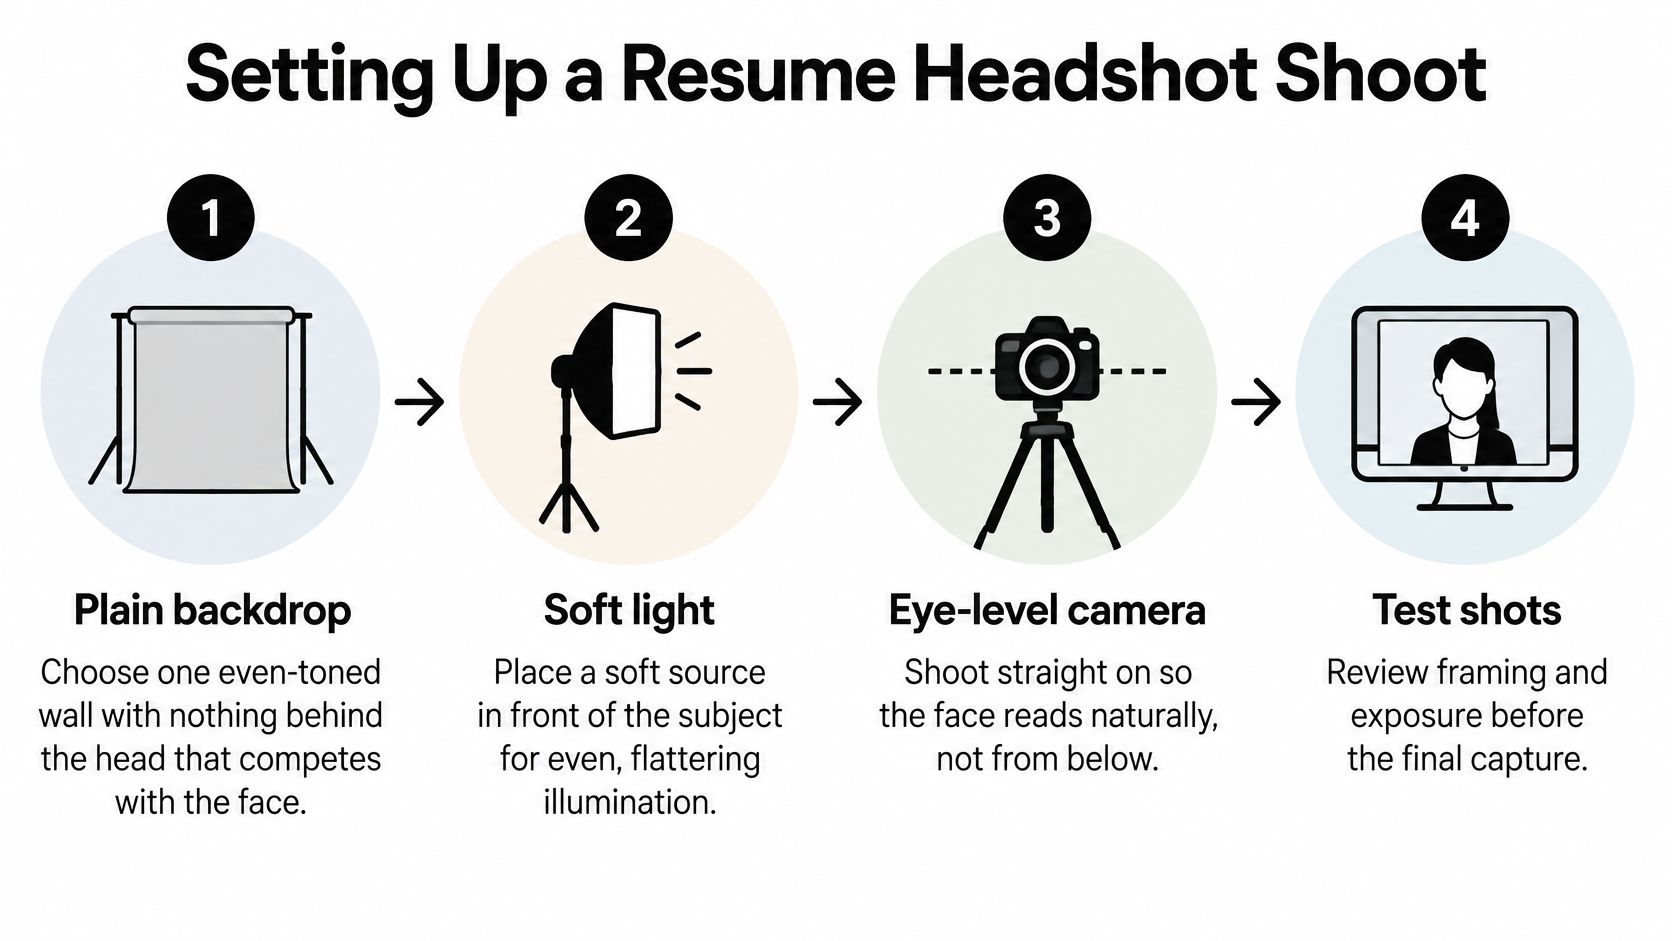
The setup below follows the workflow that the Studio Pod's headshot requirements guide lays out: a simple background, a soft key light slightly above and about 45 degrees in front of the face, fill or reflected light on the shadow side, and none of the usual culprits such as overhead or fluorescent fixtures, backlighting, direct sun or strong sidelight.
The shoot, step by step
- Set the background first. One plain wall in a single even tone, with nothing behind your head that competes with your face. Take the picture in front of it before you think about anything else.
- Position the key light. Soft source, slightly above eye level, about 45 degrees in front. This is the single adjustment that separates a portrait from a passport photo.
- Fill the shadow side. A reflector, a white wall or a second soft lamp lifts the shadows under the eyes and chin. Without it, half the face falls away.
- Match the camera to eye level. Shooting from below widens the jaw and shortens the forehead. Straight on reads as a person, not an angle.
- Frame head and shoulders. Leave a little room above the head so the crop doesn't feel tight, and confirm the eyes are sharp.
- Shoot a high-resolution original. Everything else, from a resume thumbnail to a print, is exported from that file.
Framing and file specifications
| Element | Target setting | Why it matters |
|---|---|---|
| Background | One plain, even tone | Keeps attention on the face |
| Key light | Soft, slightly above, about 45 degrees in front | Reduces harsh facial shadows |
| Fill light | Reflected or soft light on the shadow side | Softens shadows under eyes and chin |
| Crop | Head and shoulders clearly visible | Stays recognizable at small sizes |
| Digital file | Sharp JPEG from a high-resolution original | Clean at resume and profile sizes |
| Print file | About 300 dpi, around 1,500 × 2,100 px for 5 × 7 in | Keeps detail on paper |
Why the quality check runs in that order
Work through the checks in sequence, because a later flaw can hide an earlier one. Inspect the eyes for sharp focus. Then confirm skin tones look natural rather than orange or grey. Then check that the background stays quiet behind the head. Then crop with the head and shoulders clearly in frame. Only then test the file at the exact size the resume or profile will display.
If your field sells on personal presentation, it's worth comparing headshot photographers for brokers before booking anyone, since a commercial brief differs from a generic corporate portrait. For everyone else, a phone, a window and a wall will do.
Here's the same sequence demonstrated end to end.
What a good result looks like on screen is unremarkable, and that's the point. The face is evenly lit, the eyes are crisp, the wall behind is blank, and nothing about the frame makes a viewer work to find you.
Clothing, Background and Expression That Read Well
Clothing does a specific job in a small photo. Solid colors and subtle textures keep the focus on your face, while logos, busy stripes and large jewelry pull the eye away from it. Match the formality to the field, because a bank or a law firm expects more structure than a design studio or a hospitality team, and the image should look like the person who'll walk into that interview.
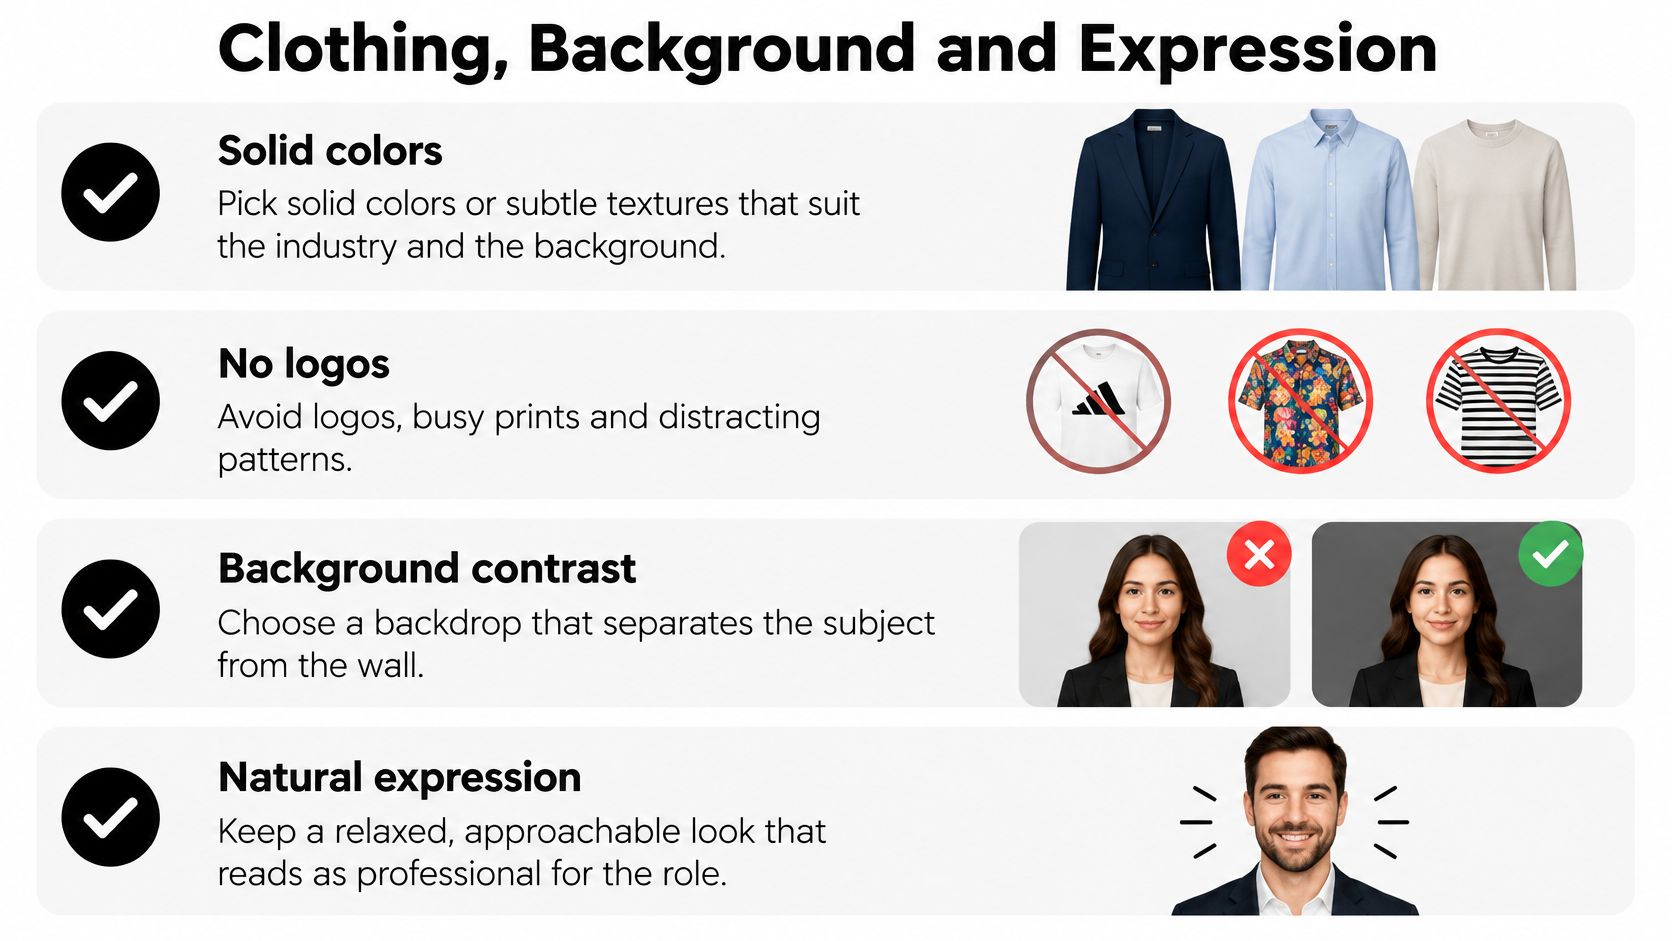
Background choice follows the same logic. A neutral, workplace-appropriate backdrop works across industries, and a slightly darker wall behind a lighter shirt creates separation without decoration. For expression, aim for a natural, slight smile with relaxed shoulders. Held tension in the shoulders travels straight to the jaw, and a posed grin reads as posed at thumbnail size.
Where the headshot carries the most weight
Presentation is part of the job in sales, consulting, media, real estate and hospitality, which is why companies in those fields put portraits on team pages and why candidates in them benefit most from a strong image. That's a point about visibility on profiles and company sites. It isn't a claim that a photo decides a hiring decision.
That distinction has data behind it. Rutgers University's career center reports that LinkedIn-related research found profiles with professional photos receive 14 times more views than profiles without photos, and that LinkedIn data indicates 86% of recruiters spend 30 seconds or less on an initial profile screening. Those figures explain why a portrait belongs on a profile. They don't establish that a resume photo changes selection outcomes, and applicant tracking systems still prioritize searchable text such as job titles, skills and work history.
Grooming shows up more than people expect at small sizes. If you color your hair, a fresh, natural tone photographs better than a grown-out one, and a guide to coloring short hair on men covers tones that read as professional rather than styled.
The self-check before you save the file: would a colleague recognize you instantly, does the outfit match the role you're chasing, and does the expression look like you on a normal good day?
Run this list before uploading.
- Recognition: someone who knows you identifies the photo without being told.
- Role fit: the outfit would be unremarkable in the workplace you're applying to.
- Expression: relaxed mouth and shoulders, no fixed grin.
- Background: nothing behind you competes for attention.
- Distractions: no logos, no busy pattern, no oversized jewelry.
Why Heavy AI Retouching Can Backfire
The instinct to smooth every pore and reshape every jawline is understandable, and it's usually counterproductive. Research published in Cyberpsychology's study of AI-generated profile images reports that AI-generated profile images were rated as higher quality than professional photographs of the same subjects, but that labeling an image as AI-generated modestly reduced perceived quality. Generation and disclosure did not significantly change perceived trustworthiness or attractiveness on average.
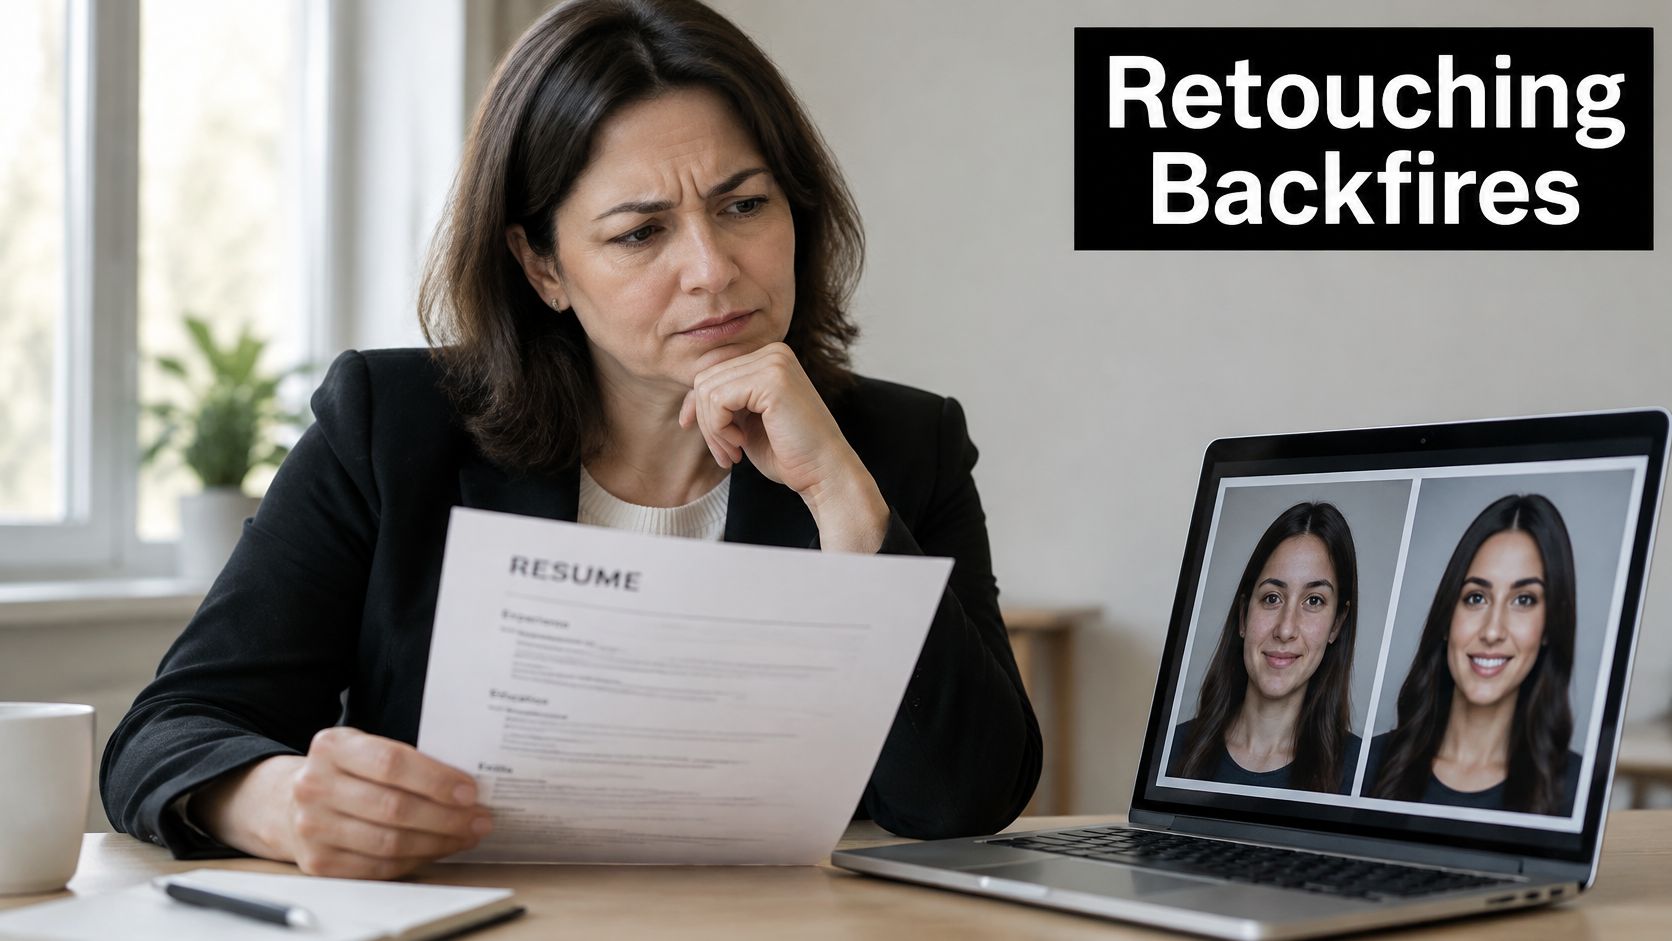
The fairness question runs alongside the quality one. The same body of work reports that generative image systems can reproduce racial and gendered beauty patterns across professions, so "more polished" doesn't automatically mean more representative or more fair. A tool trained on narrow beauty standards will move every face toward that standard whether or not it suits you.
The rule that replaces every retouching debate: keep identity, age cues, skin texture and hair, and drop the edits that reshape the face, alter complexion or restyle you into someone from a different culture.
The three-part check before upload
- Compare it with a video call. Open the photo beside a live camera view of yourself. If a stranger couldn't match the two, the edit went too far.
- Run a reverse-image search. You want to know where else that picture appears, and whether an older version is still attached to a profile you've forgotten about.
- Confirm you hold the right to use it. Check the rights to the original shot, including who took it and whether a previous employer owns it.
Candidates ask whether AI use should be disclosed. There's no universal rule, and the practical answer is that the image has to hold up if someone meets you a week later. As for material misrepresentation, the line sits at anything that changes who you are rather than how well the photo was taken.
If a shot fails the video-call comparison, reshoot it. More editing makes that gap wider, not narrower. Candidates also ask about whitening before a shoot, and a DentalHealth guide to tray whitening results sets realistic expectations for what a modest change looks like. Whatever the tool, ask where your upload goes and whether you can remove it. With our Headshots feature, the photo you upload and the look you choose are sent to Google to generate the images, and you can delete any uploaded photo or headshot at any time.
Where photos are discouraged in the first place, a no-photo resume remains the better call, and the identity rule still governs the profile version you keep.
Fixing Common Headshot Problems
Diagnose by symptom rather than by feel. Most disappointing headshots fail for one of six reasons, and each has a fix that's cheaper than booking a studio.
The most common problem is shadows under the eyes and chin. That's a key light sitting too high or overhead, so move it forward and slightly lower. Next is a face that looks dark or silhouetted, which almost always means the light source is behind you. Turn and face it.
Softness and pixelation appear when a small file gets cropped hard to fill a frame. There's no recovery from that, so start from a larger original or reshoot. A background that pulls the eye needs a plain wall and tighter framing, not more editing.
The quiet one is a face that looks unfamiliar to the people who know you. That's over-retouching or reshaping, and the fix is reverting the smoothing rather than adding more. Harsh, uneven color comes from fluorescent or mixed lighting, so shoot near daylight with one type of light in the room.
Headshot symptoms, causes and fixes
| Symptom | Likely cause | Fix |
|---|---|---|
| Shadows under eyes and chin | Key light too high or overhead | Move the light forward and slightly lower |
| Face dark or silhouetted | Light source behind the subject | Turn to face the light source |
| Soft or pixelated when enlarged | Heavy cropping of a small file | Reshoot or start from a larger original |
| Background pulls the eye | Cluttered or patterned backdrop | Use a plain wall and tighter framing |
| Face looks unfamiliar to people who know you | Over-retouching or reshaping | Revert smoothing and reshaping edits |
| Harsh, uneven color | Fluorescent or mixed light | Shoot near daylight with one type of light |
Sort the fixes by effort before you start. Moving a lamp, re-cropping or reverting an edit takes minutes. A new background, a different outfit or a reshoot costs an afternoon, so exhaust the cheap repairs first and only then set up the camera again.
Confirm Your Photo Before You Apply
Everything above collapses into a five-minute routine you run once, right before you send an application.
- Confirm the market and the posting. Include a photo only if local norms or the employer expect one.
- Keep two files. A resume version that follows the market, and a profile version for LinkedIn or a portfolio.
- Check that it looks like you. The resume image should match how you appear on a video call, and you should hold the right to use it.
- Archive the original. Storing the full-resolution shot means new crops for other platforms don't need a second shoot.
- Test at the actual size. Open the final crop on a phone and a laptop, at the dimensions it will appear, and confirm the eyes still read sharp.
If you'd rather not book a photographer, ParakeetAI's Headshots feature turns one photo into studio-quality headshots for LinkedIn and your resume, in the look you pick, and you can delete any uploaded photo or headshot at any time. The same identity check applies to whatever it produces. When you're ready to rebuild the document itself, a resume builder that tailors the document to the role you're targeting keeps the photo and the text in one place.
Decide the market first, then choose the version, then run the routine. That order keeps you from adapting a US resume for a German posting at midnight.
A strong portrait starts with you and one good photo. ParakeetAI's Headshots tool turns a single picture into studio-quality headshots for LinkedIn and your resume, in the look you choose, so you're not booking a studio session to get a clean, neutral image. Once the photo is settled, try it in the ParakeetAI workflow, where Headshots, Resume Maker and the Prepare tools sit together, and see how a matching resume and a matching portrait change your application.